Monday 19 November 2012

Eggless Chocolate Cake with Orange buttercream icing


If you are from Kerala, or live in Kerala rather, you would know, eggs and anything related to poultry were a complete no-no, thanks to a 'bird flu' outbreak. So, my lil' K asked for a chocolate cake one of those days and I started hunting for good eggless chocolate cake recipe, and as usual was finding it difficult to settle on one.
It was then that coincidentally, the 'Vanitha' magazine, carried in it's latest edition an eggless chocolate cake recipe. This was an easy decision as the other couple of recipes I looked at required condensed milk, and I didn't have any.
                       
                     
This is a very simple recipe. Sift the dry ingredients together. Add the wet ingredients together in another bowl, then mix and off to the oven. Couldn't get simpler right? The original recipe uses an accentuation of an orange butter cream icing. I wasn't sure if K would like it, so I omitted the oranges in the recipe.

The case was dark and moist and had good flavour. I would definitely recommend this. 


Recipe

What you need
1. All-Purpose Flour - 200 gms 
    Powdered Sugar - 200 gms
    Cocoa Powder - 4 tbsp
    Soda Bi-Card - 1 tsp
    Salt - 1/2 tsp
2. Vegetable Oil  - 5 tbsp
    Vanilla Essence - 1 tspake tin 
    White Vinegar - 1 tsp
    Water - 250 ml

Here's How
1. Pre-heat your oven to 180 deg Cel
2. Grease and Line a 13x 23 cm loaf tin or a 20 cm diameter round cake tin
3. Sift all the dry ingredients together (1)
4. Make a small hole in the middle of the dry ingredients; Add the wet ingredients (2) here and mix till well-combined.
5. Transfer this to your cake tin and bake for 30-35 mins or till a skewer inserted in the centre comes out clean

Orange Butter Icing
What you need
 Unsalted Butter - 125gms
 Icing Sugar - 250 gms
Orange Juice - 2 tbsp
Orange Zest - 1 orange

Here's How
1. Beat the butter and half of the icing sugar well
2. Now add the remaining Icing Sugar along with the orange juice and beat well
3. Now add the orange zest and mix with a light hand
4. Slice your cake into 2,  horizontally, and add your icing; spread it well.
5. Sandwich the layers and apply icing on the outside as well

Recipe Source: Vanitha Magazine

Sunday 16 September 2012

Yummy Murukkus!! Fresh and homemade...'amma-made' actually. It has been a while since amma  made thse lovelies at home. This one is a wonderful recipe. 'Tried and Tested', of course! and the best of all recipes Amma has tried so far; good enough to be the only one to be repeated.
Amma pressing out the murukkus with the idiappam presser onto banana leaves

Amma finally made a batch to send to my nephew, who, needless to say, savours every bite. Amma makes it less often these days as most of us are favourites of LDL - C; only meaning to say we are on the higher end of the cholestrol spectrum; including yours truly...sigh!! 

That doesn't stop me from enjoying these though! tee hee! They taste as fresh and crsip and melt in your mouth with ease, something store-bought murukkus, rarely do.


Murukku dough

Murukkus pressed out on banana leaves to be slid into oil, in the background.
 

amma's murukkus, in my most favorite pair of tiny hands!


Murukku

What you need
Raw Rice Powder (Unroasted) - 3 glasses
Besan powder - 1 glass
Kayam - 1 to 2 tsp
Butter - 2 - 3 balls of lime
Salt - To taste
Jeera powder - 2 tsp

Here's How
Make a dough with all of the above mentioned ingredients, using enough water (there's a photograph of the dough, if you scroll up)

Using an 'Idiappam Press' (String Hoppers), shape out murukkus onto Small oiled banana leaves/ parchment paper

Heat oil and deep fry

Notes
you can see the idiappam press in photo no 1, pressed-out dough on banana leaves; with amma pressing out dough in the background in the others

                                                                Recipe Source: Amma


Wednesday 25 July 2012

Karkidaka kanji - a healthy porridge for a rainy month

It's still raining here. (Not even nearly as much as it  for should though! The main dam here apparently has just enough water to produce electricity for the next 72 days! eeks! I can hear the rain gods say; you burn a hole in the ozone, you cut the trees down, you reclaim land from the sea, you fill out rivers and lakes, you dig away the sand on the river bed -  and you the say the climate has changed! I say you have changed, so we can't but change with you!!).
So this is the official month of 'Karkidakam' (We Malayalis, like many others, have our own calendar). This was in the 'the good ol' days', when man respected nature more, a dark and cold month, literally. The skies would be perpetually overcast, bringing down the heavens. It would rain day and night, and night and day. It was difficult for the people to get fresh produce to cook with. Harvest would happen only after this month. It was also a season of illnesses and epidemics. In order to nourish themselves to gain immunity against diseases, during a time when preventive vaccinations were non-existent, and also for nourishment when good food wasn't available, this kanji was prepared daily in homes, during this month; a tradition carried on to this date. 
There are many variations to this kanji. Ayurveda suggests adding a lot of medicinal herbs and spices for gained value. I have posted a couple of other links at the end of this post if you want to take a look or know more about the tradition. This recipe is a simple home-made one. You could add more herbs or spices into this. You can imagine this will not taste like a french onion soup. tee hee. I haven't tasted too many varieties, so maybe there is one, which does taste really nice, depending on what you add. We usually add freshly grated coconut as garnish, which does add to the taste.

Karkkidaka Kanji

What you need
1. Uluva (Fenugreek) - 1 cup
2. Cherupayar (Green gram) - 1 cup
3. Navara rice - 1 cupeat - 1
4. Cracked Wheat - 1 cup

Here's how
Soak ingredients  1 - 3 in water overnight. Next morning, add the cracked wheat to this, and pressure cook this with enough water. Now leave to simmer for 20 minutes; and there you have. You could add a very generous pinch of freshly grated coconut before serving. You could add more or less water, when serving depending on your preference.


You  could read more about Karkkidaka Kanji here and here

Tuesday 26 June 2012

5 minute microwave chocolate cake with nutella, in a cup

I'm trying to eat lesser sweets. It's very hard!!! So I don't buy chocolates or the lovely ghee cake we get in our neighbourhood bakery, or ice cream....sigh! Let's us say I'm still trying hard. Anyway, what with my 'not so strong' resolution, the current situation at home is, unlike earlier there is nothing 'sweet' lying around at any given point of time.

You know those times after lunch or dinner, when your taste buds and palate demand something sweet. My sister asked me to try yoghurt or just water to put an end to the craving. I stayed off  my dessert for a week. What an achievement! That deserved a celebration...something sweet obviously!
I was my usual lazy self, and couldn't bother to make a cake and was too lazy to step out to buy a chocolate. So a quick and easy, not to forget, lovely cake in cup, it was! It was yum!!! IT only takes minutes to put together and less than 2 minutes to cook! I took the liberty of finishing a cup and was generous enough to leave half a cup  for J
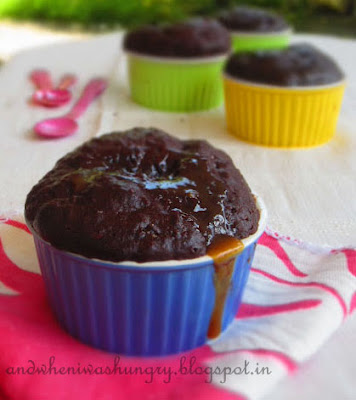
The next time I made them, I used my ramekins. I've been waiting for a reason. to use them. I love their pretty colours. Anyway, these mini quick are great. It would taste better with icecream or custard as Sandee suggests. I did find it a bit dry, so next time, I might reduce the cooking time by 10 seconds or so. The additon of nutella does take to higher level as you can anticipate. Sandee said it was 'brownie'ish; but my end product was more like a cake, hence the name. If you do try it, let me know how the consistency was. 
These are so easy to put together, when your lil' one decides to bring a couple of friends, have sudden guests, or feel like a home made sweet bite.


Microwave Cake in a cup in 5 minutes

What you need

  • 1 egg
  • 4 tablespoons of flour
  • 4 tablespoons of sugar
  • 3 tablespoons cocoa powder
  • 3 tablespoons of nutella
  • quarter teaspoon of baking soda
  • 6 tablespoons milk
  • 3 tablespoons extra virgin olive oil
  • 4 soft candy, toffee type 

Preparation

  1. We put in a bowl all ingredients except candy and egg shell, which we know. Mix well.
  2. We get two large cups, split the dough between them.
  3. We put a couple of candy in each cup, pressing them to sink into the batter.
  4. We put a cup in the microwave, and schedule 1 minute 45 seconds (full power). 
  5. Serve hot or warm ideally, alone or with a scoop of vanilla ice cream, a little cream, ...

Notes

Sandee hasn't used a standard measuring spoon. You could take a look at her step-by-step pictures here. That perhaps explains the difference in consistency. 


Thursday 21 June 2012

Parippu Vada (Lentil fritters) - from the land where the rain is born..

Pitter-patter. It's that time of the year again!! That time when the heavens descend on my home-land...home-state, more precisely. This is the time of the year every Malayali (people from the state of Kerala in India are called Malayalis; there! I saved you a google search, in case you were planning to) waits all year for.

                                
Find me a malayali who does not like to be home during the rains and I shall be VERY surprised. You get the picture. The monsoon lives in our hearts. It is part of our culture, childhood and our very hearts. I remember the years I was out of Kerala during monsoons, and thirsted for the sound of the rain, the coolness of the atmosphere, the smell of the soil and the warmth it brings to our hearts. It is pure joy to be woken up by the sound of rain the mornings
Schools here invariably open on June 1st. I remember not a school re-opening day, where mother nature hasn't drenched us in her glory. She arrives bright and early on the 1st of June, bringing joy to the soil, the trees and our hearts. ( What with global climate change things are sadly changing). But this time was no different thankfully. Schools reopened on June 4th; and mother nature changed her plans and arrived to drench all on the 4th!!!!!!
                 
Parippu vadas feature in every monsoon season dreams. The sound of rain, the chill, hot tea and parippu vadas make a delightful combination. As I write this post, I'm listening to the sound of rain, sipping into my tea, savouring the last vada and feeling happy to be home - home in god's own country...where the rain is born.....


Parippu Vada (Lentil Fritters)


What you need
Kadala parippu/ Chana Dal - 2 cups
Dried Red Chill/ Vaatal mulaku - 2
Pearl/Small Onion - 10 (finely chopped)
Curry Leaves - 2 stems  (finely chopped)
Ginger - A small piece (finely chopped)
Green Chilli - 2 (finely chopped)
Salt - As required
Oil - enough to deep fry the vadas


Here's How:
1. Soak the dal for atleast an hour (2 hours will be better)
2. Drain it and grind in the mixie with the red chilli (Don't add any water). Grind coarsely. Do not grind it finely.
3. Now add the rest of the ingredients to this mixture and mix well
4. Take small portions, make a small ball, and flatten in it your palms. (Wetting your hands will do good, as this prevents the mixture from sticking to your hand)
5. Deep fry in oil and drain on a tissue
6. Best served with tea -YUM!!!


Friday 1 June 2012

Penne with homemade Roasted pepper sauce (the easiest ever!)


I think I have told you earlier about J's love affair with Italian food. He loves his pasta! It's like his hummous withdrawal. He also gets 'pasta withdrawal' I think.
Most of J's colleagues at work, have rice for lunch and never fail to wonder how J can have pasta for lunch on most working days. He in turn wonders how they can have rice. You get the picture. He comes up with various versions of sauces, featuring sun dried tomatoes and pesto (A couple of precious bottles purchased from Chennai; sadly we don't get many gourmet products here), olives...the work. 
This recipe is ever so easy. The original doesn't have garlic in it. But I added some. Also I didn't have any thyme, so i added oregano and some chilli flakes for some zing!


Homemade Roasted pepper Sauce


What you need             
Red Peppers - 3
Red Onions - 2
Oil -  1 Tbsp
Dried Thyme - 1 Tbsp
Tomato puree' - 500g


Here's How
1. Heat oven to 220 deg C 
2. Cut the red peppers and onion into chunks and toss in oil and thyme; then roast for 30 mins until soft
3. Cool and then blend until just chunky
4, Stir in the Tomato puree, season and warm through (I heated a tbsp of olive oil, added around 3 cloves of garlic, chopped and dunked in the puree, followed by the pepper sauce and then seasoned it)
5. Cook your pasta as per the packet instructions, mix in the sauce and enjoy. J likes to add olives too!


    Recipe Source: BBC Good Food - India magazine


Thursday 24 May 2012

Coconut Blondie

Tea time cakes are fabulous you must agree. They're light, fresh, full of flavour and even better when home made. This one is an absolute favourite of mine. 


I wasn't very excited when I came across this, in 'Vanitha' magazine. I wanted to do a quick cake once and asked my mom to suggest a non-pound/chocolate/orange cake. She asked me to try her coconut cake, which is sooooo delightful. We hunted for the recipe a quite a bit. You know how it is. When you don't need something, it stares you in the face every day; and just when you need it, somebody in the house decided to do a bit of spring cleaning a day back!!!
So then, thankfully, my brain cooperated with me this time and reminded me of this recipe. So Coconut blondie it was! I made it for a birthday again, where most of the attendees were over 65 and not huge fans of chocolates. It went down more than very well, thankfully.
Again, I like this one without any icing or toppings. It's what tea-time cakes are meant to be - simple and without any fuss. It's a simple recipe and can be made in no time. The demerrara sugar and the coconut adds to the flavour


Coconut Blondie 
What you need 
1. Butter (softened) - 1 cup
2. Brown sugar/ Demerrara sugar - 1&1/2 cups
3. Eggs (big) - 4
4. Baking powder - 2 tsp
5. Vanilla essence - 2 tsp
6.All purpose flour - 2 cups
7. Grated coconut - 3/4 th cup

Here's How
  • Preheat your oven to 350 deg F/ 170 deg C (I bakes at 150 deg C)
  • Line and grease your cake tin (The recipe suggests 13x9 pan; I used a 20 cm round tin
  • Beat the butter till smooth. Now add the sugar and beat till fluffy. Now add the eggs, one by one and beat on each addition till combined. Now add the vanilla essence
  • Sift the flour with the baking powder; and fold it into the butter mixture. 
  • Now, add the grated coconut and mix till combined
  • Pour this into your cake tin and bake till a skewer inserted in the centre of the cake, comes out clean.(Took me around 45 - 50 mins in my oven)
  • Cool and cut into delectable slices..tee hee


Recipe Source: 'Vanitha' magazine

Friday 11 May 2012

Pav Bhaji - Street food/ fast food Indian style

Pav Bhaji is to Indians what hot dog is to the Americans, if I may. Indian fast food at it's best. Fresh pav buns toasted in ghee/ butter on the tava/pan with a medley of vegetables in a delectable amalgamation of spices, topped with a knob of butter and a sprinkling of finely chopped onions and a squeeze of lime. Drool-worthy to the last bite!


Vendors with pav bhaji are a common sight in the North of India, but unfortunately for those few of us down South, it is not. You do get in bigger cities here, but in my city, the only place that did serve street food closed quite some time back; and I'm not aware of any new place just yet
This is one my favourite recipe for pav bhaji. This recipe is chef Marut Sikka's version of the bhaji. I came across it in 'Rhodes across India' on UKTV. It uses mushrooms with gives it a nice texture, which is quite unusual in a traditional bhaji; I've also used cauliflowers sometimes. Really depends on how you like it. On the street, the bhaji is left to simmer for quite a while (Read an hour or more). Chef Sikka suggests 1/2 hour; I did 15 to 20 mins. 


Pav Bhaji

What you need

For the bhaji sauce
2 tbsp butter
4 cloves garlic, finely chopped
1 large onion, finely chopped
400 g tomatoes, finely chopped
1/2 green pepper, finely chopped
1/2 yellow pepper, finely chopped
1 tbsp ground cumin
1 tsp red chilli powder
1/4 tsp ground cloves
1/2 tsp ground cinnamon

For the bhaji
3 tbsp butter
600 g potatoes, cooked, peeled and diced
1 large carrot, blanched and finely diced
150 g button mushrooms, quartered
1 green chilli, finely chopped
1 cm ginger, grated
2 tbsp chopped coriander
1/2 tsp garam masala
1/2 tsp black salt, powder
To serve
50 g butter
pao bread rolls

Here's How

. For the bhaji sauce
1: heat the butter in a saucepan over a medium heat. Add the garlic and just allow it to soften before adding the onion. Gently fry until it turns translucent, without colouring. Add the tomatoes, reduce the heat and cook for 10 minutes until they start to reduce to a pulp.

2. Add the remaining ingredients, stir for a few minutes then remove from the heat. Transfer to a food processor and blend until smooth. Set aside.

3. For the bhaji: heat half the butter in a frying pan. Add the potatoes, carrots and mushrooms and cook for a few minutes, moving them around the pan so that the potatoes begin to break down. Remove for the heat.

4. In another large saucepan, heat the remaining butter over a low heat. Add the blended bhaji sauce and stir in the potato mixture. Add the green chilli, ginger, half the coriander, the garam masala and the black salt. Stir in a little water to loosen the mixture, then simmer gently for 30 minutes. In Indian street stalls it is usually left to simmer for 3-4 hours.

5. To serve: split the pao bread rolls in half and fry the centers in a knob of butter until crisp and golden. Serve with the bhaji.

Thursday 3 May 2012

Butter Cookies/ Jam Cookies


Call them what you want, but these are oh so lovely! These are the quintessential everyday biscuits/cookies (Depending on which side of the pond you stay). I remember Amma making us her version of the butter cookies, when we were in school. All shapes and sizes; melt in your mouth, simple home made biscuits. I'll reserve that for another day.

This post had been in my drafts for a while now. When I came across it in Ria's blog (Ria's collection), I made it immediately. I have made this over 20 times now and is equally loved by everyone. I always make this to send to my nephew and he loves it. He too prefers it sans the jam, though he is a 'jam person' (He loves his chapathis with jam too)

A few people have found it a tad bit less sweet for their liking; you could put on a small layer of jam then I suppose. I don't like to put jam on personally. I feel it masks the taste of the base cookie/ biscuit. These are ever so simple and tastes yum and fresh. Ria loves it with her jam I understand.


Butter Cookies/ Jam Cookies
What you need

1 cup butter, softened
½ cup sifted powdered sugar
2 ½ cup all purpose flour
1 tsp vanilla extract
½ cup raspberry/strawberry/mixed fruit preserve


Here's How

  • Beat butter at medium speed of an electric mixer until creamy; gradually add powdered sugar, beating until light & fluffy. Add flour and vanilla, mixing well. Shape dough into a ball.
  • Roll out the dough and cut out rounds, equal in nos. (You need 2 types: one solid round, another round with a smaller round in the centre i.e.; doughnut shaped); I did mostly solid round
  • Pierce solid cookies with a fork. Bake at 300 deg for 20 mins on ungreased cookie sheets. Bake till very lightly browned.
  • Spread jam just before serving & sandwich one solid cookie with the doughnut shaped cookie
    .

 Recipe Source: Ria's Collection 
(riascollection.blogspot.in) 


Saturday 24 March 2012

Pancakes with banana and jaggery filling

 
I have never made pancakes at home before this; and the only combinations I have had is maple syrup and banana. This recipe uses bananas and jaggery, and ever-so-delightful combination for the filling and that's topped with freshly grated coconut. They work together like a dream.  This only takes minimal time to put together.

I did the find the pancakes a bit eggy (DUH!...2 eggs! ring a bell somewhere..I know, I know). But, if you're like me and don't like the 'eggy' taste, try adding  a few drops of vanilla essence/extract, as you like. It did ease out the taste quite a bit; or if you have any better suggestions, do let me know.

It's great for nice sunday brekkie for kids and adults alike, or a great snack for children. It did get wiped out at home. 
Pancakes with banana and jaggery filling

What you need
For the pancake
All purpose Flour - 50 gms
Eggs - 2
Honey - 2 tsps
Sugar - 1 tsp
Melted butter - 1 tsp
Milk - 150 ml

For the filling
Butter - 1tsp
Plantain/Banana - 1 (Chopped finely)
Sugar - 1 tbsp
Grated Coconut - 4 tbsp
Melted Jaggery - 2 tbsp
Cardamom powder - a pinch

Here's how
Add all the ingeredients for the pancake to your mixing bowl and after you combine it well, pass it through a sieve, and keep it aside (don't move the mix) for 10 mins
After you make your pancakes; keep it aside

Heat the butter. add the banana. Once, it's nicely toasted (for plantains, wait till it becomes soft), add the sugar and mix well.
Now, add the jaggery and coconut, and once it's mixed well, add the cardamom powder and remove from fire.

To assemble, put in a bit of filling in the pancake and roll.

Recipe Source: 'Vanitha' magazine